Quickstart
The fastest path from a fresh install to a running, verified agent. This page deliberately skips
options and edge cases — it links out to the full Configuration Reference and
Deployment Guide for everything beyond a first working setup. Written around the
SLURM backend, since it's the most common first deployment; other backends follow the same shape
with a different backend_type and backend_settings block (see your plugin's README under
plugins/).
Budget about 15-20 minutes if the offering side is already set up in Waldur.
1. Create the offering in Waldur
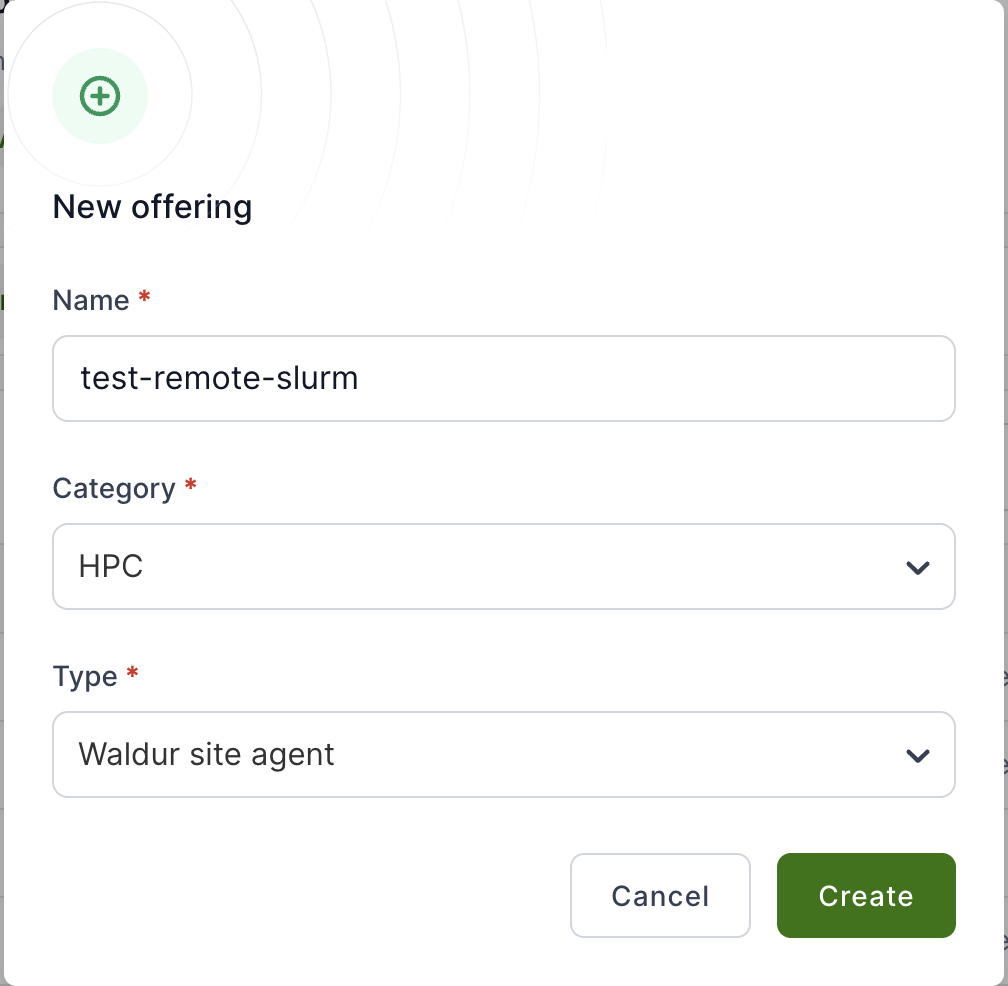
- Go to the
Service Providersection of your organization, open offering creation, pick a name and category, and selectWaldur site agentfrom the type drop-down.
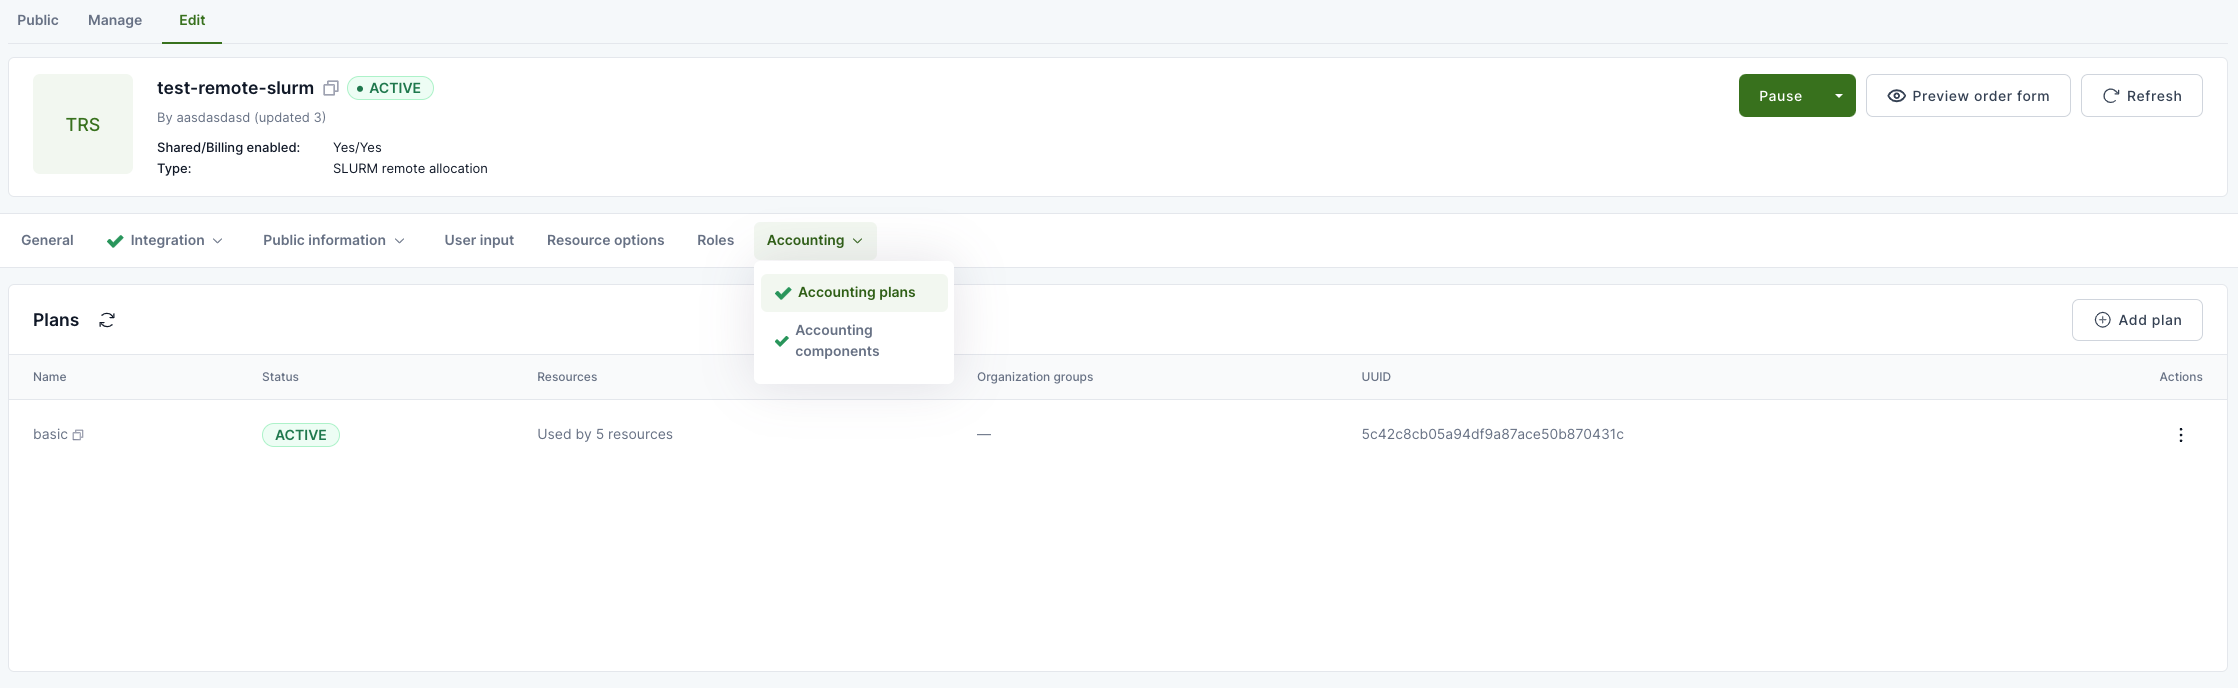
- On the offering's
Edittab, openAccounting→Accounting plans, add a plan.
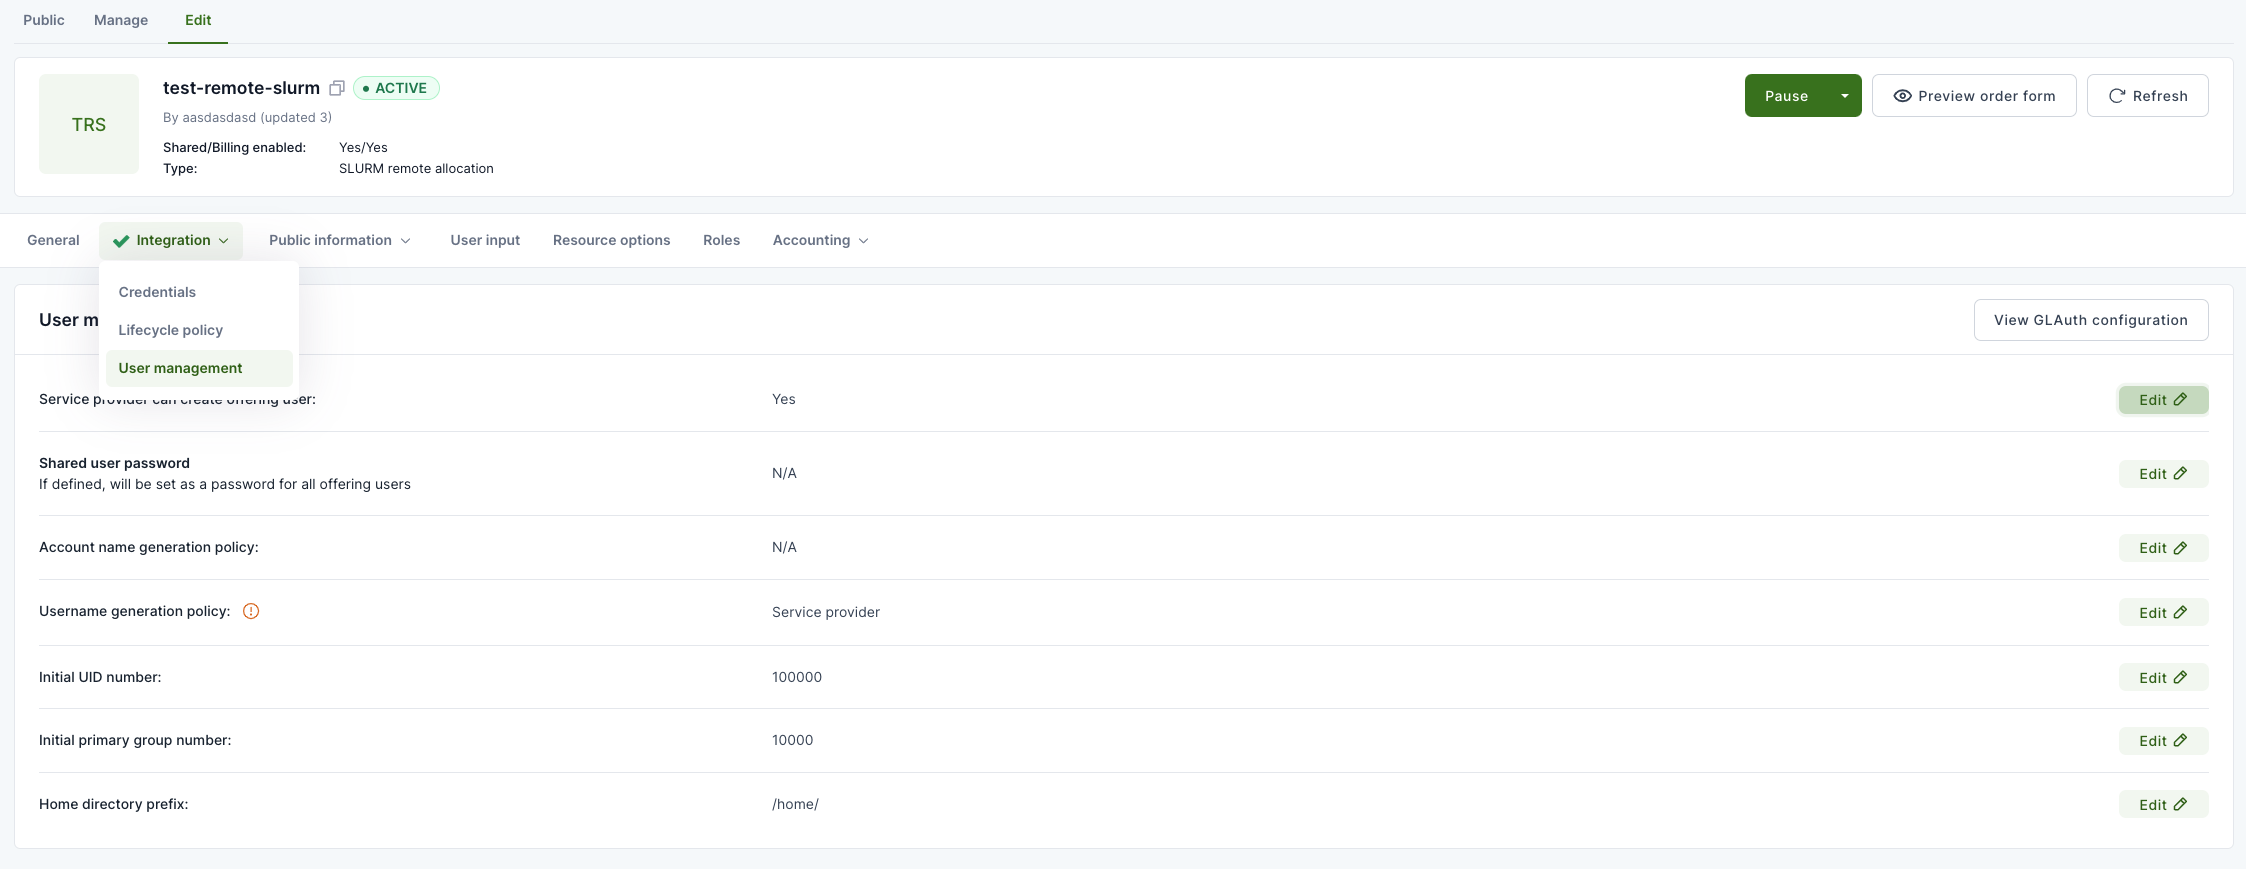
- Still on
Edit, openIntegration→User management, setService provider can create offering usertoYes.
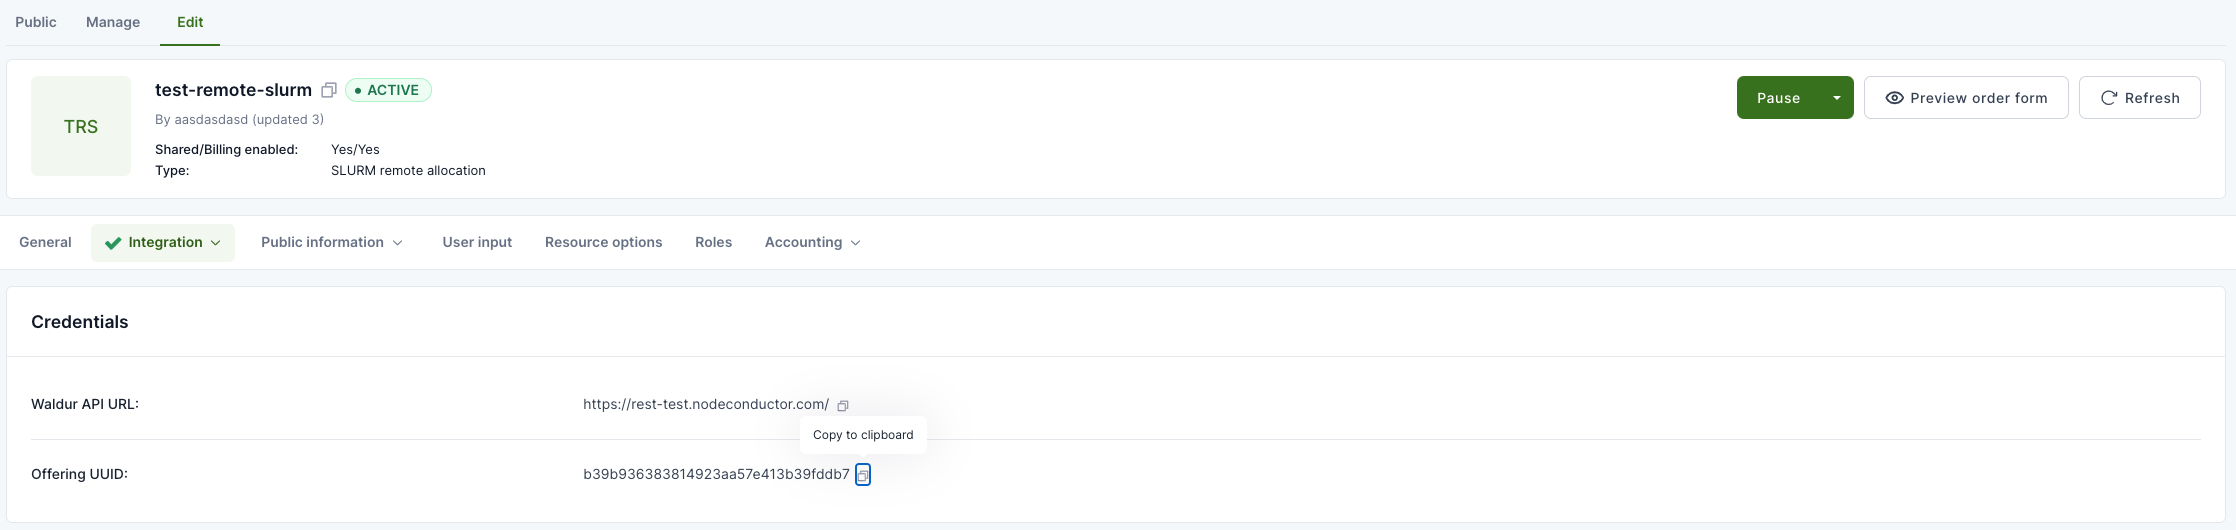
- Activate the offering with the green
Activatebutton. - Copy the offering UUID from
Integration→Credentials— you'll need it below.
-
Create a dedicated agent account — a Waldur login that exists only for the agent to authenticate with, not a real person's. As a staff user, go to the
Supportworkspace →User management→Users→Create user, and work through the wizard: set ausernameandemail, and set (or generate) aPasswordon the Account step — leave it blank and the account ends up passwordless. LeaveStaffandSupportunchecked; offering-level access, granted next, is all this account needs. -
Grant that account the OFFERING.MANAGER role on this specific offering — not a customer-wide role. On the offering's
Teamtab, useAddto invite the account with theOFFERING.MANAGERrole. This is the minimum the agent needs and nothing more: it covers order approval, usage reporting, and resource state/backend-metadata updates. It's unrelated to theGET_SERVICE_PROVIDER_API_SECRET_CODEpermission mentioned in step 3 below — that one's only needed by a human using the UI config generator, not by the agent's own token. -
Create an API token for the agent account. You'll need it below too. Log in as that account, open the avatar menu in the top-right corner → Profile → API token tab, then click the eye icon to reveal and copy the token.
That page also has a Token lifetime setting (10/30 min, 1/2/12 hours, or indefinite) — it's extended automatically on each successful API call, but the agent runs unattended and can go quiet for stretches (initial setup, a paused service, sparse polling intervals) that outlast any timed option. Set it to indefinite — anything shorter will eventually expire and break the agent's auth. The UI warns that an indefinite token can be used by anyone who has it until it's changed, so treat it like any other long-lived service credential: keep it out of version control and out of shell history.
2. Install the agent
The core package has no backends of its own — install it together with the SLURM plugin and the default username backend, in one environment:
1 2 3 4 5 6 7 8 9 | |
The Installation Guide covers the OS packages (including the SLURM client tools the agent shells out to), a pip-based alternative, other backends and why commands below are called by their full path.
3. Write a minimal config
Option A: generate it from Waldur (SLURM only, recommended)
For SLURM offerings, skip hand-writing YAML entirely. On the same Integration → Credentials
page from step 1, open Actions → Generate Site Agent Config. It builds a config from your
actual offering — name, waldur_api_url, waldur_offering_uuid, all three *_backend
fields, backend_settings, and backend_components (including your real plan components, not a
generic example) are filled in for you. Only waldur_api_token comes back as a placeholder
(<YOUR_API_TOKEN_HERE>) — swap in the token from step 1. Copy or download the result as
waldur-site-agent-config.yaml.
You need the GET_SERVICE_PROVIDER_API_SECRET_CODE permission on the customer to see this
action — if it's missing from the Actions menu, that's usually why.
Option B: write it by hand
Only the fields below are required to get a SLURM offering running. Everything else in the full example (multi-offering setups, LDAP, prepaid billing, QoS management, home directory quotas, ...) can wait until this is working.
1 2 3 4 5 6 7 8 9 10 11 12 13 14 15 16 17 18 19 20 21 22 23 24 25 | |
Swap in real values for the three lines marked REQUIRED. default_account must already exist
in sacctmgr — the agent doesn't create it for you.
Either way, wherever the file ends up, remember to save it at
/etc/waldur/waldur-site-agent-config.yaml (or update the -c path in the commands below to
match).
4. Load offering components into Waldur
This pushes the backend_components block above (the cpu component here) into the offering as
a billable plan component. Without this step the offering has nothing to charge for.
1 | |
5. Check your setup before you touch systemd
1 2 | |
This checks both sides for every offering: the Waldur API, your token and the offering, and the
backend itself — for SLURM it runs the SLURM tools, so a missing sacctmgr or an unreachable
accounting database shows up here. It exits non-zero when something is wrong. Once at least one
resource exists (step 7), the SLURM plugin's deeper check compares an account's SLURM state with
what Waldur expects:
1 2 | |
<allocation-account> is the SLURM account the agent created for the resource: its backend ID,
shown on the resource in Waldur, normally allocation_prefix followed by the resource's slug.
6. Enable it for real
Follow Deployment → Systemd Service Setup to install and
start the services: three for polling (order_process, membership_sync, report) or two for
event-based processing (event_process, report). Come back here once they're running.
7. Verify end-to-end
Place a small test order against your offering in the Waldur marketplace, then:
1 2 3 4 5 | |
The resource should move to OK in Waldur and the account should exist in sacctmgr with the
prefix/limits from your config. If it doesn't, see
Deployment → Troubleshooting — that section is ordered to match
the failure modes you'll hit at each step above, starting with waldur_site_diagnostics.