Project management
Project creation is allowed for organization owners in their organizations and staff users.
Note
User must have an account in Waldur instance to create projects.
- Select your home organization.
- Under the Project tab, click on Add.
-
Fill the necessary fields (fields marked with * are mandatory) and click Create.
- Project name - The original title of the project.
- Project description - A brief description about the project.
- OECD FoS code - OECD science field code (more info)
- Start date - once reached, marks the date when prepared user invitations are sent out and triggers the processing of previously made resource orders.
- End date – once reached (plus any configured grace period), triggers the creation of termination orders for the existing resources. If the resources have already been terminated by this time, the project will be removed. The date is inclusive.
-
If you need to edit project details later, open your project and select the Edit tab.
Note
Your Waldur administrator may enforce a project name convention (for example, a maximum length). If the name you enter does not meet the requirement, the form shows an error and the project is not created. See Project name restrictions.
Note
- If a resource has a termination date that comes after the project's end date, the project's end date will automatically become that resource's termination date.
- If a resource has a termination date that comes before the project's end date, we'll use the resource's original termination date.
- Important: Setting any end date (either the project's or a resource's) only creates a termination request. The resource remains active in the project until the termination process is fully completed.
Grace period
A grace period adds extra days after the project's end date before resources are actually terminated. This gives project members time to back up data or request an extension.
Grace period can be configured at two levels:
- Organization level – applies to all projects in the organization by default.
- Project level – overrides the organization-level setting for a specific project.
Setting the grace period
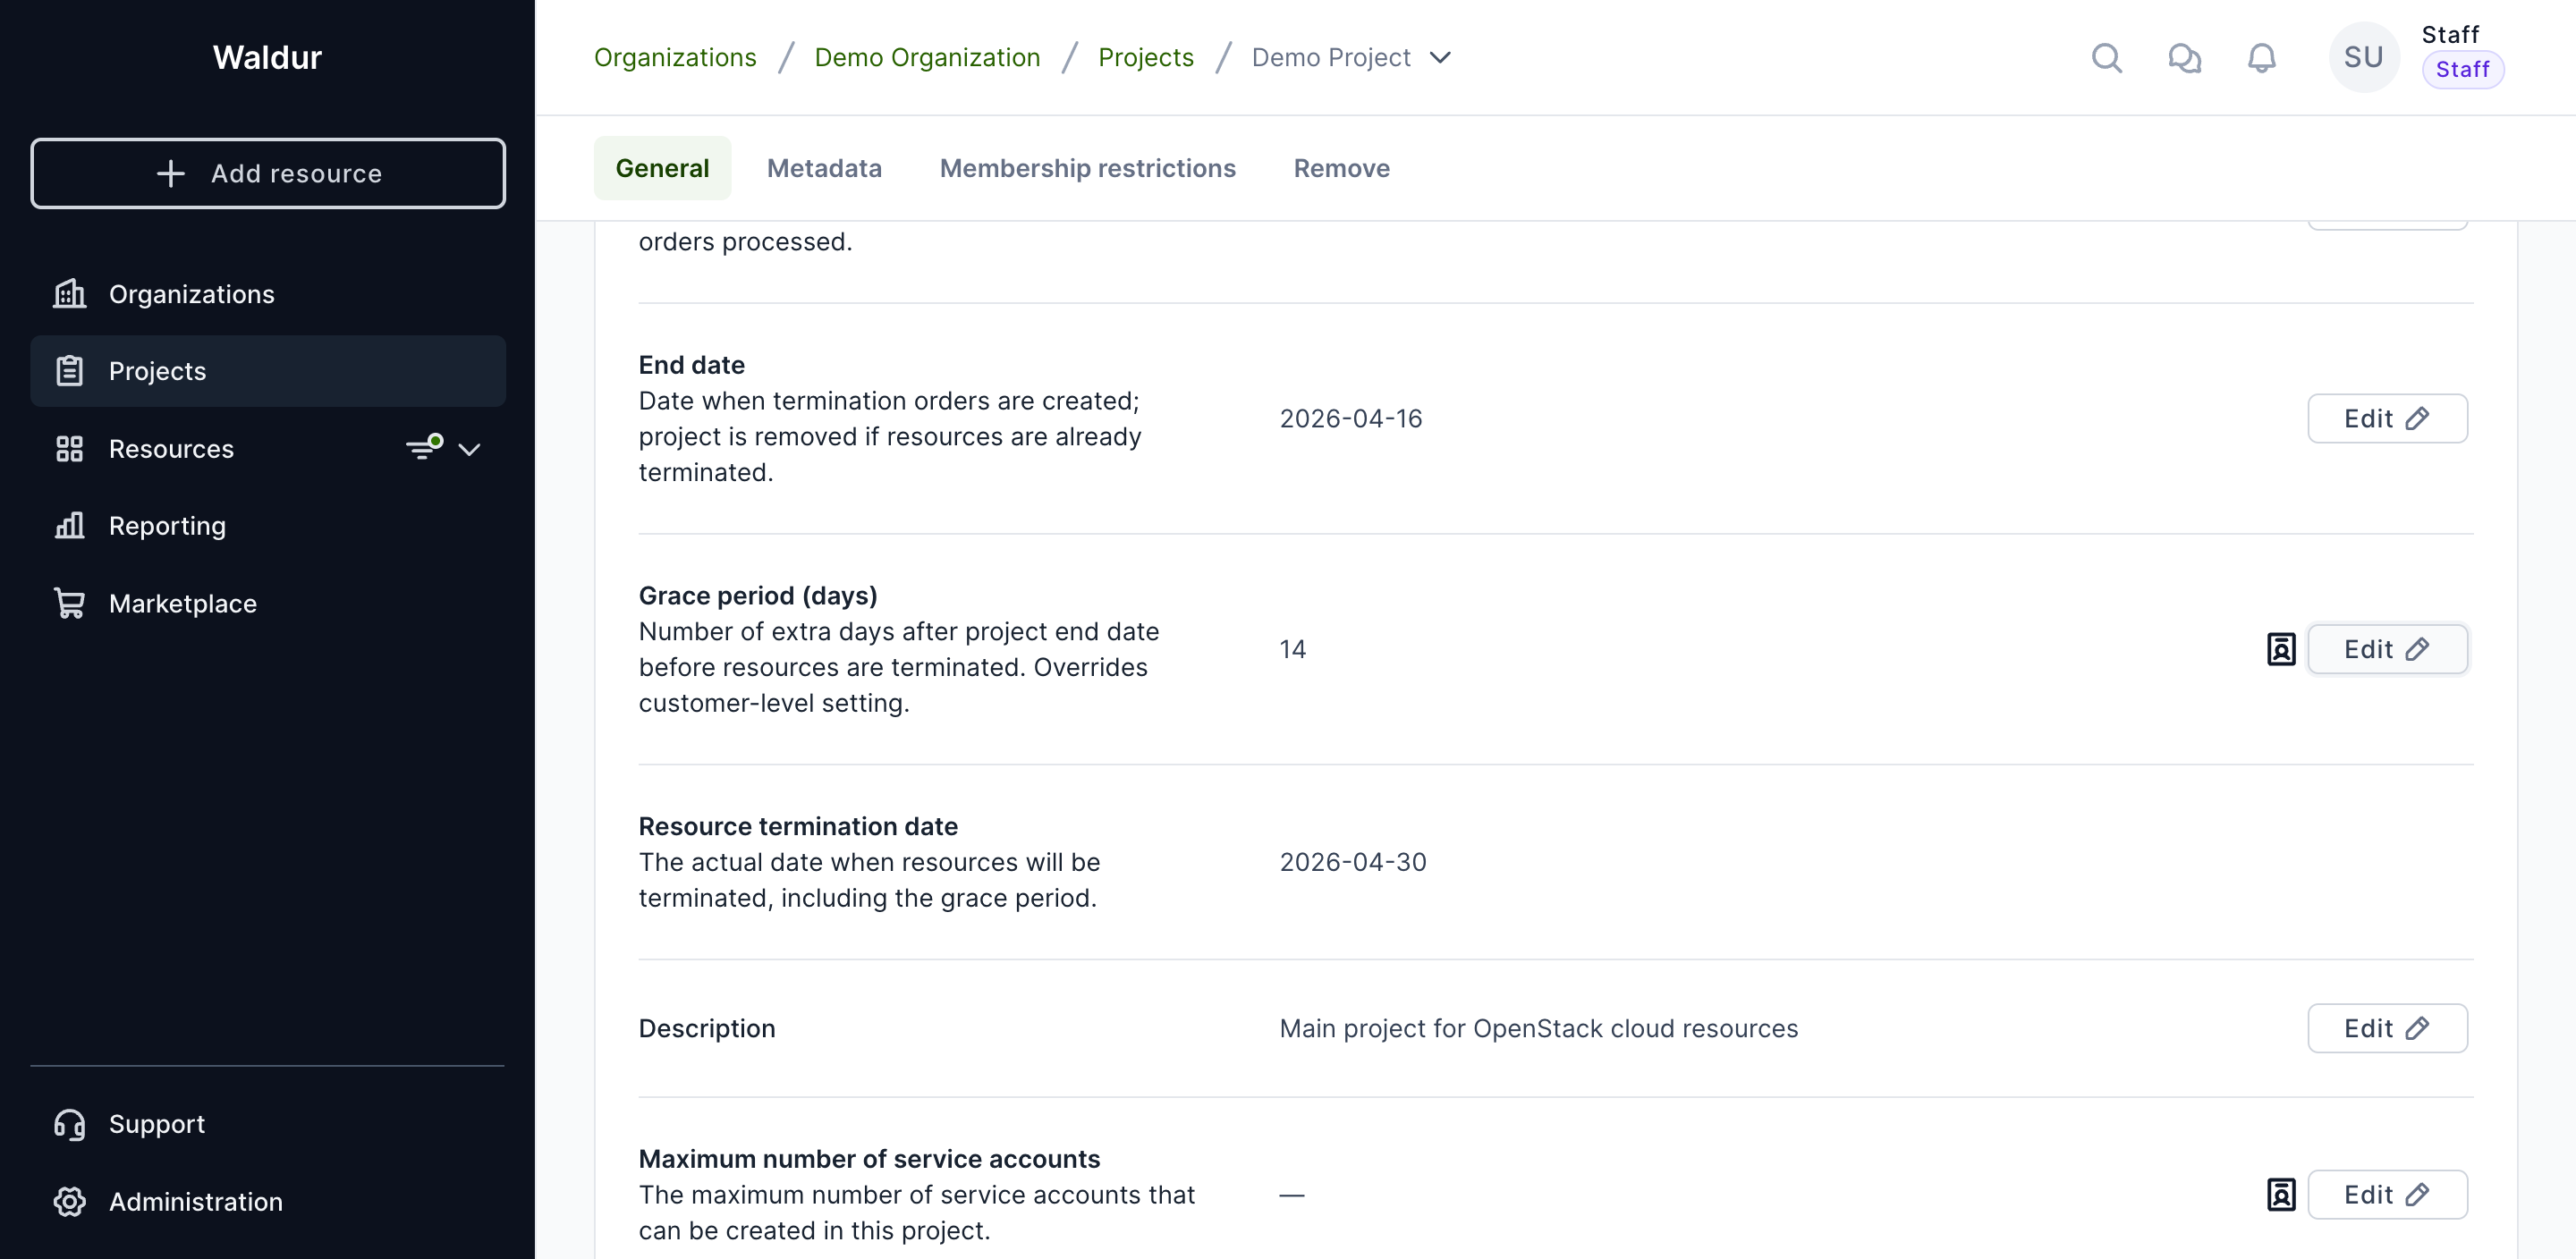
Staff users can set the grace period on the project's Edit tab under General settings. Enter the number of days in the Grace period (days) field.
Once a grace period is set, a Resource termination date row appears showing the actual date when resources will be terminated (end date + grace period days).
How it works
When a project has a grace period configured:
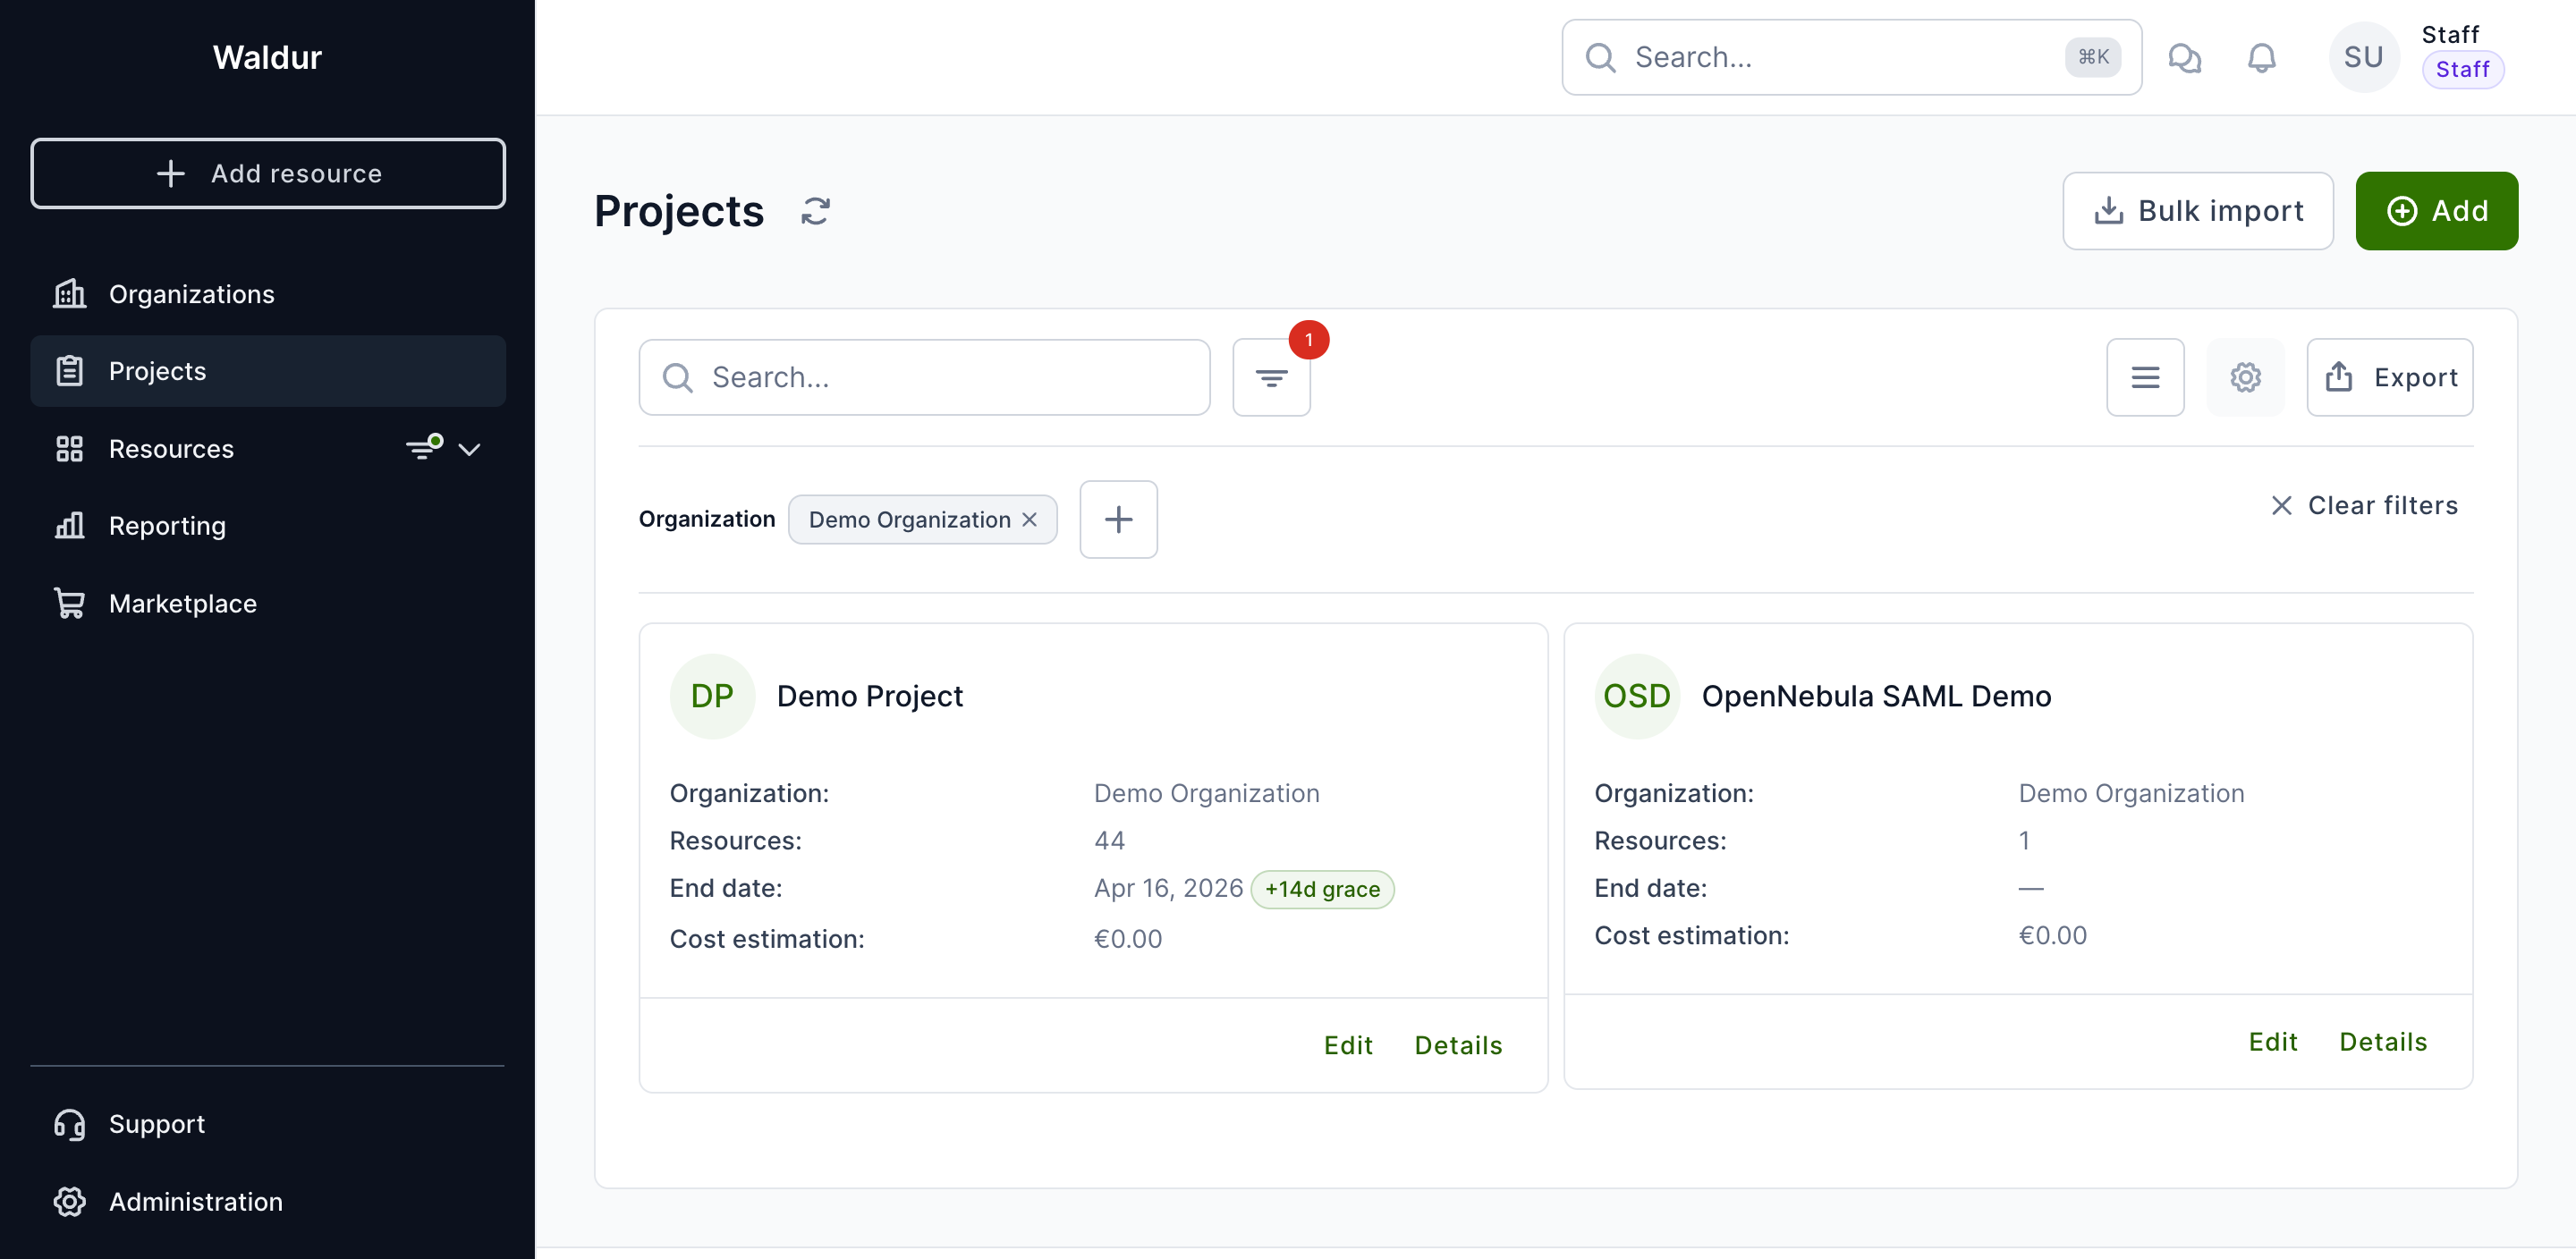
- The project list shows a badge next to the end date indicating the grace period (e.g., "+14d grace").
- When the project's end date has passed but the grace period is still active, an "In grace period" badge appears.
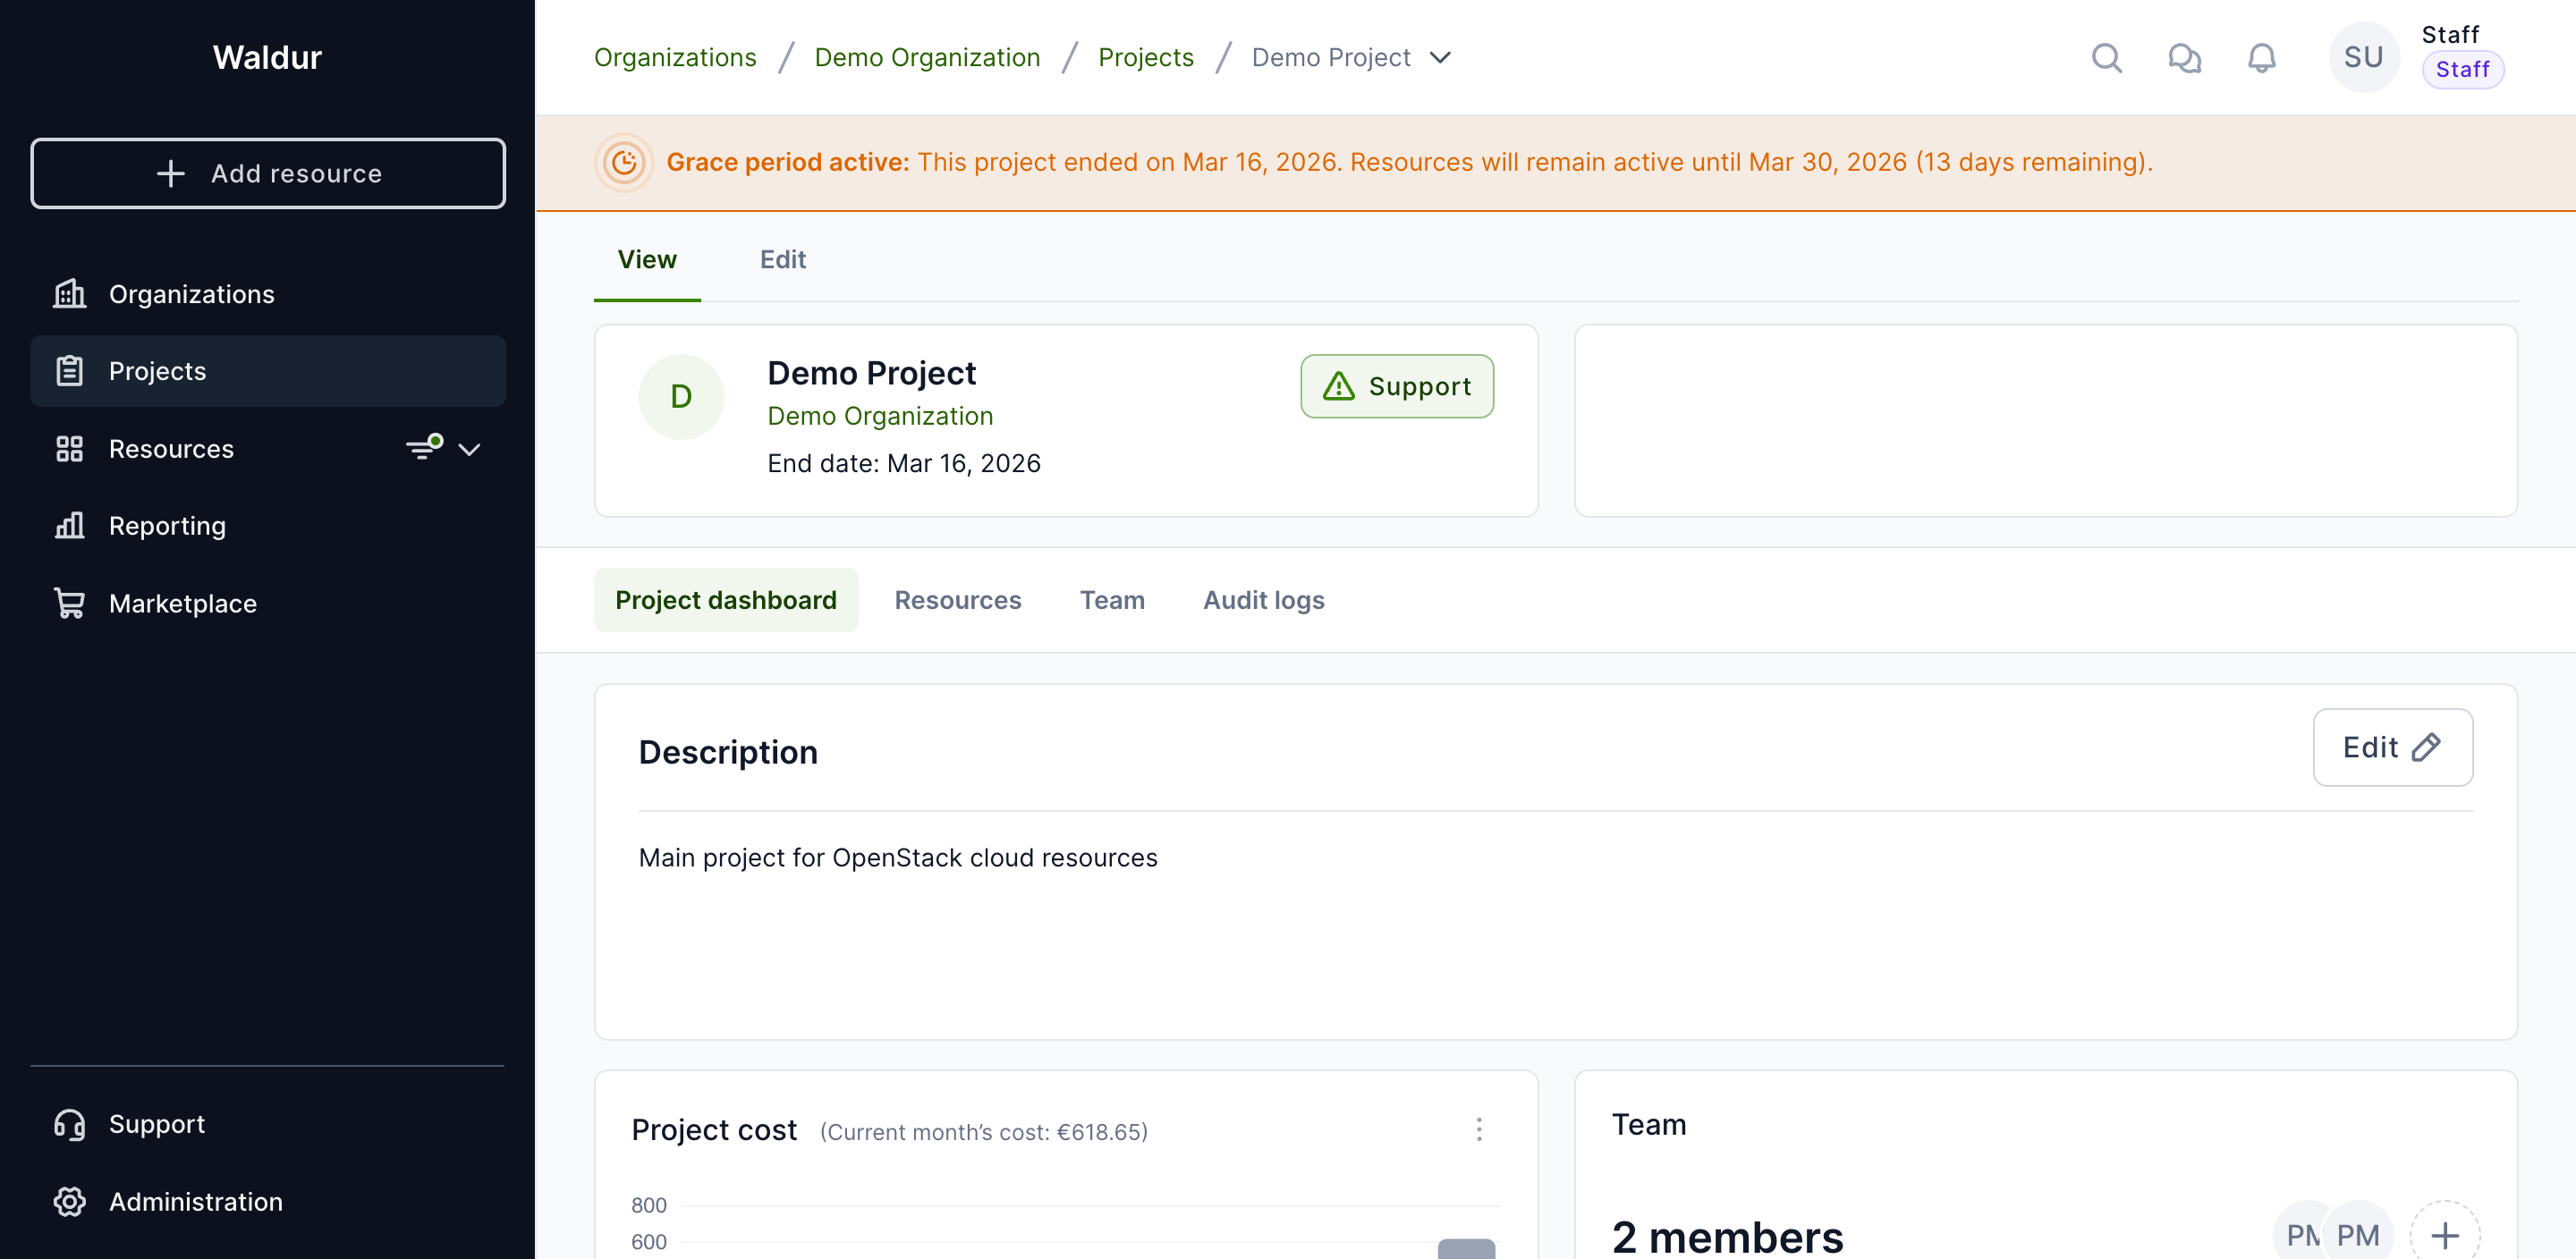
- A warning bar is displayed at the top of the project pages showing the original end date, the resource termination date, and the number of days remaining.
- Notification emails about project ending include grace period details when applicable.
Resources during the grace period
From the first day after the project's end date, resources of offerings that support pausing are paused for the rest of the grace period. The pause is applied by a daily task that runs early in the morning (server time), so it takes effect on that first day. For providers that enforce the paused state, such as SLURM through the site agent, the paused resources no longer accept new work. Their data is kept until the grace period expires.
- The pause stays in place for the whole grace period, even if the resource's usage is within its limits.
- Extending the project end date (or removing it) lifts the pause automatically, unless the resource must stay paused for another reason, for example because its usage is over a limit or a cost policy requires it.
- Extending the end date does not lift a pause that staff set manually. On offerings with a SLURM usage policy, however, the policy lifts a manual pause once the resource's usage is below its limit.
- Offerings that disable the grace period are not paused: their resources are scheduled for termination on the project end date.
Warning
Once the grace period expires (i.e., the resource termination date is reached), all project resources will be scheduled for termination, just as they would on the regular end date.
Science domain
If staff have configured a science-domain taxonomy and enabled the feature, every project can be tagged with one Science domain and one Science sub-domain. The tag helps with cross-project reporting and discovery.
Note
If no domains have been created yet, or the feature is disabled by staff, the picker is hidden — both in the project create dialog and on the project metadata page.
Tag at project creation
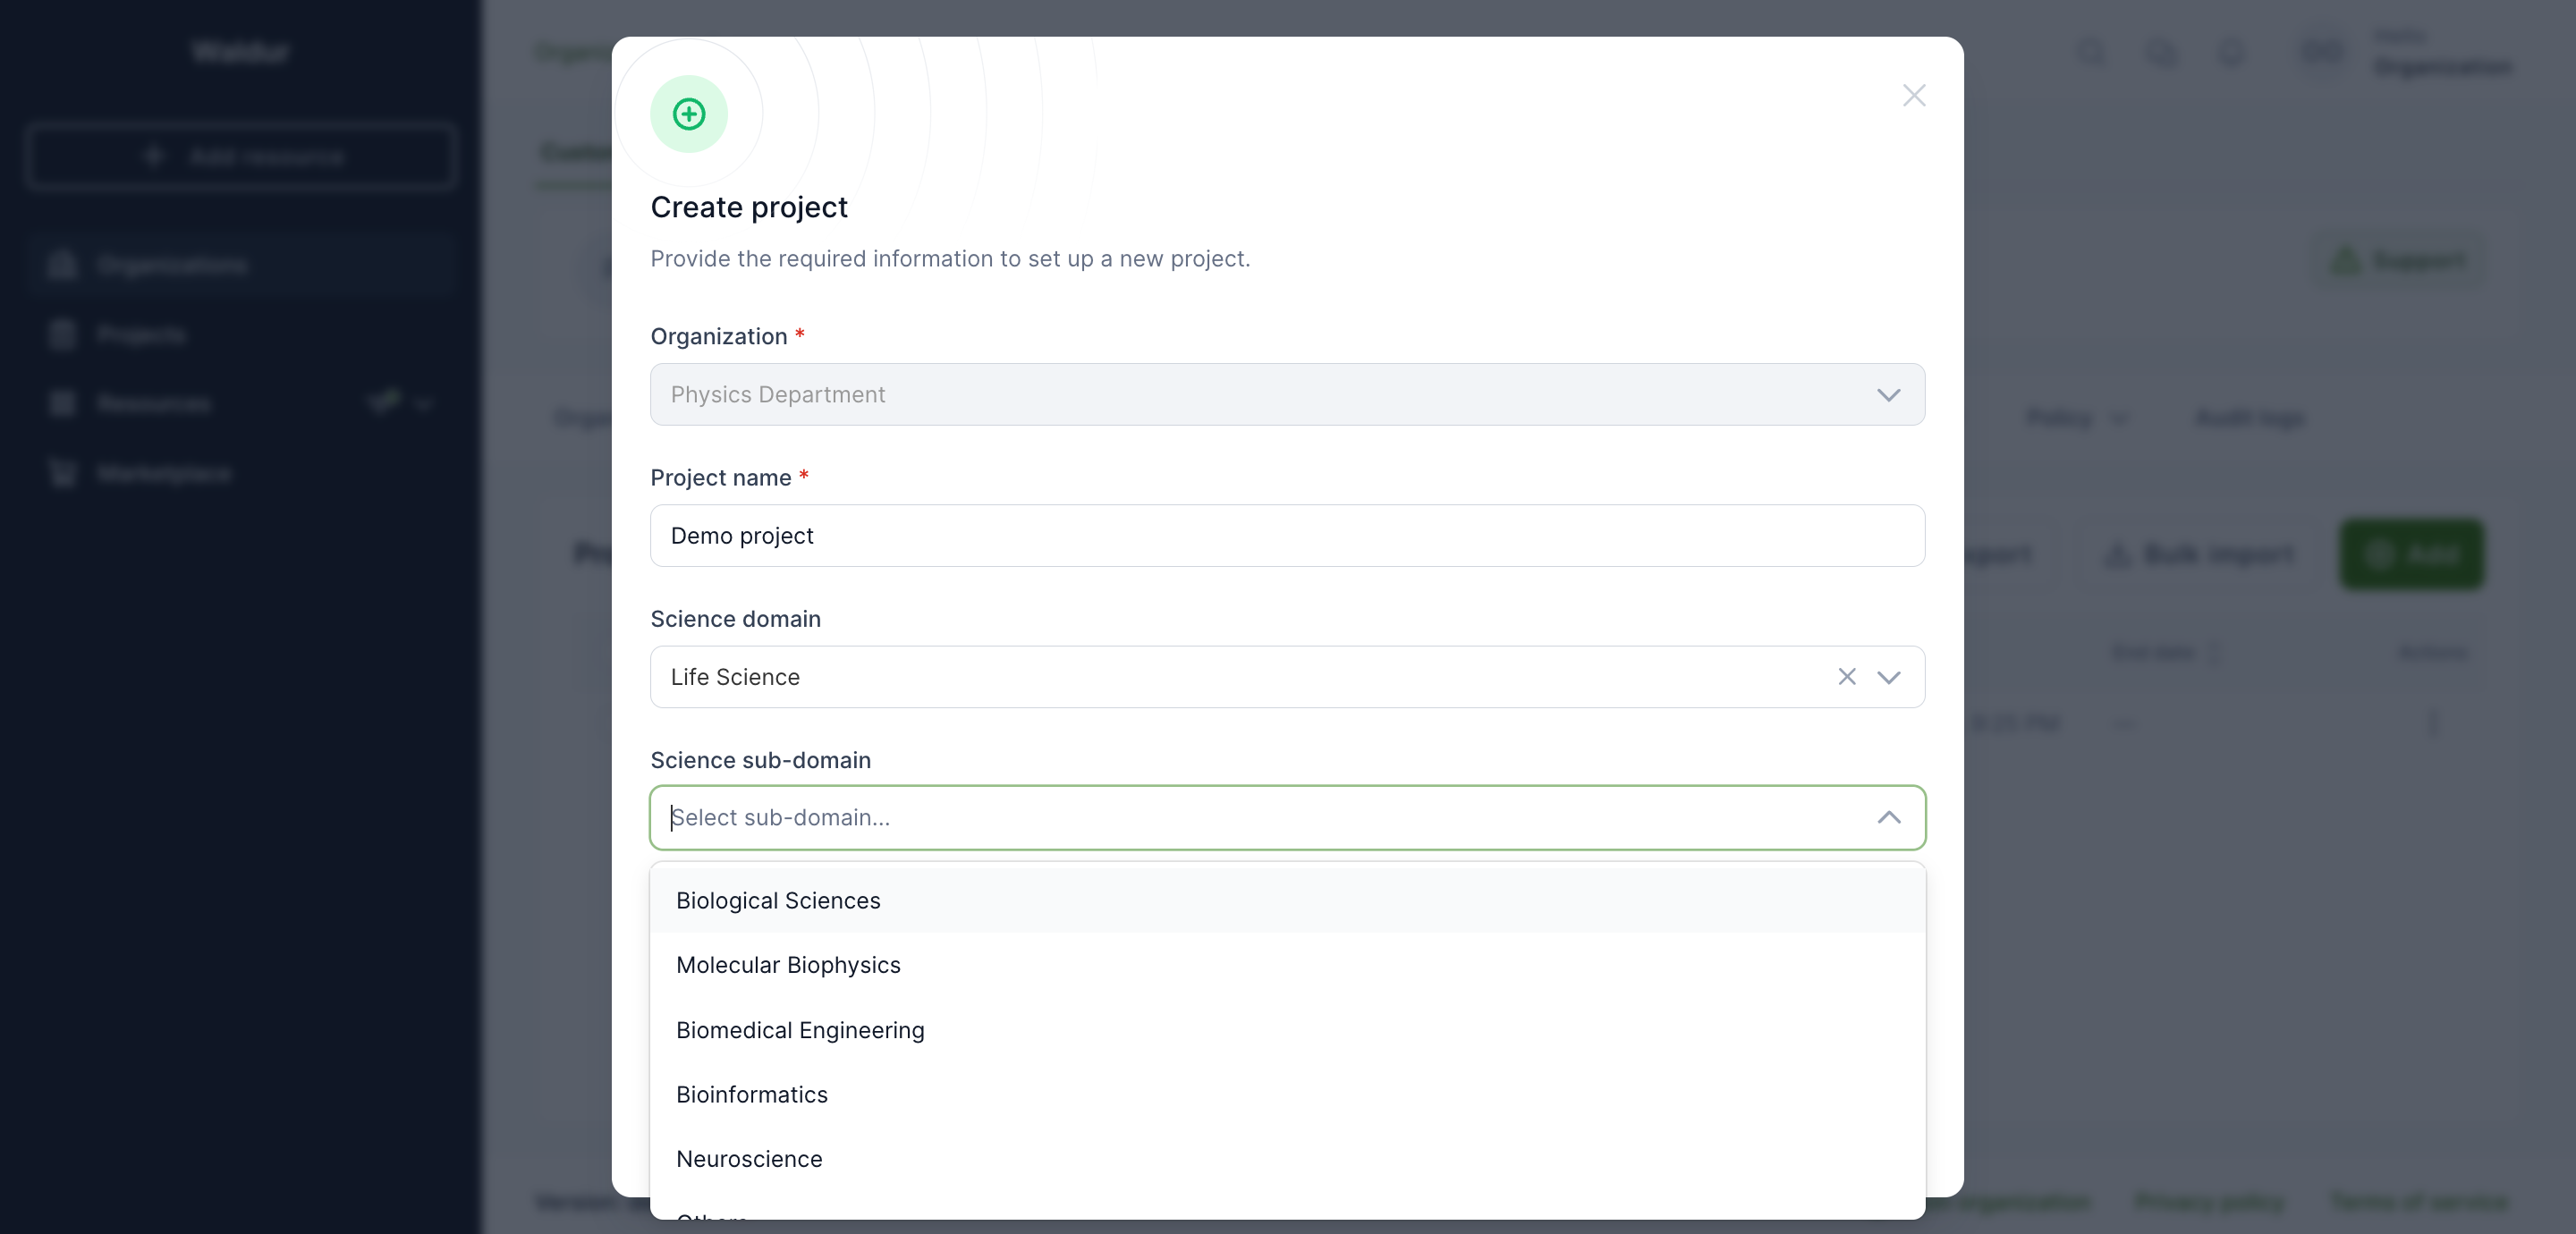
In the project create dialog, two selectors appear below the project name:
- Pick a Science domain.
- The Science sub-domain selector unlocks and lists only the sub-domains belonging to the chosen domain.
Both selectors are optional. Leaving them blank simply omits the tag.
Change later from project metadata
To set or change the tag after creation:
- Open the project and switch to the Edit tab.
- Select Metadata in the tab strip.
- Find the Science domain row (shown as
Domain > Sub-domain, or a dash if unset). - Click the pencil icon, pick a domain and sub-domain, and confirm.
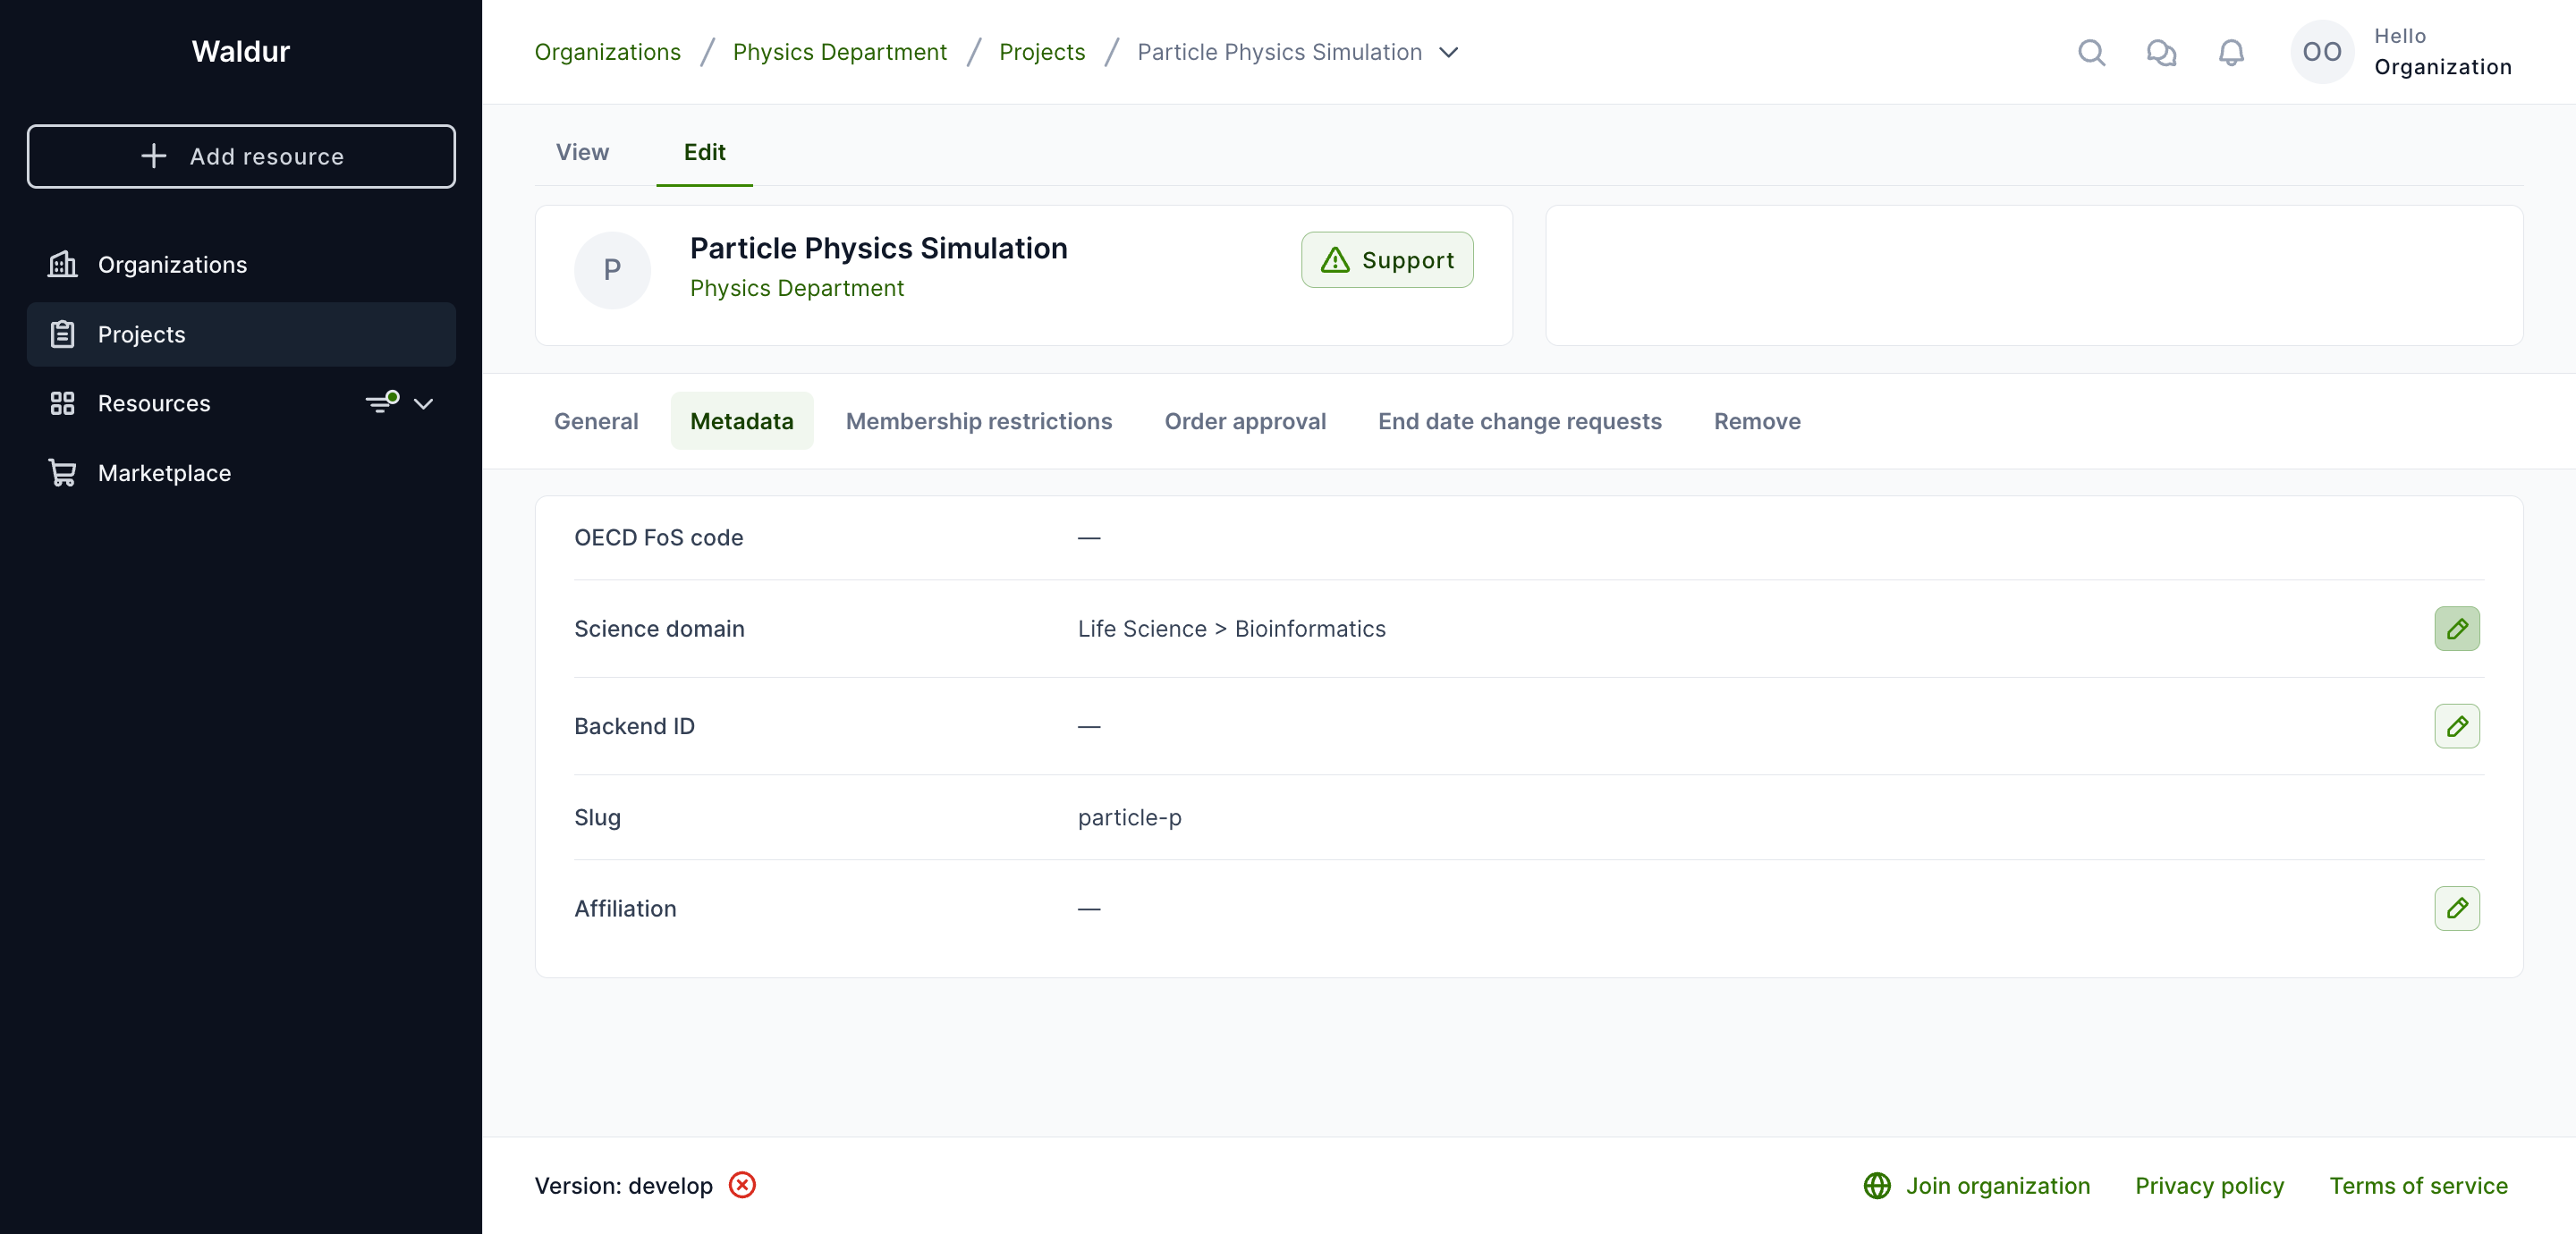
Only project managers, organization owners and staff can edit the tag.
Order auto-approval
Project owners and managers with the order-approval permission can configure a project-level rule that auto-approves marketplace orders on the consumer side when the order's estimated monthly cost is at or below a configured ceiling. This removes a manual step for predictable, low-value orders while keeping anything unusual under human review.
Note
Only orders for plans whose components have predictable cost qualify. If the selected plan bills any component by usage, the order will always require manual review regardless of the configured limit. A limit-based plan qualifies even when the same offering also has a usage-based plan.
Configuring the rule
- Open the project and switch to the Edit tab.
- Select Order approval in the tab strip.
- Click Configure (or Edit if a rule already exists).
- Toggle Enable auto-approval and enter the Monthly cost limit in the platform currency.
- Click Save. The card immediately reflects the new state: a green Enabled badge, the configured limit, and an audit row showing who saved it and when.
The same dialog has a Remove rule action to delete the rule entirely. To temporarily pause auto-approval without losing the configured limit, save the rule with the toggle off — the card will show a grey Disabled badge and the limit is preserved for re-enabling later.
Discovery from the project dashboard
The project dashboard's Project cost widget overlays the configured limit as a horizontal mark-line on the cost chart so members can see at a glance how the project's current spend compares to the auto-approval ceiling. Hovering the line shows the configured limit.
The widget's actions menu also exposes a Manage order auto-approval shortcut that jumps straight to the Order approval tab.
What members see when placing an order
When a project member submits a new order through the marketplace, the deploy page's total card shows one of these notices based on the order's estimated monthly cost:
- Order will be auto-approved — recurring monthly cost is at or below the project limit and the selected plan has no usage-based components. The order skips manual consumer review on submission.
- Order will need consumer approval — either the recurring monthly cost exceeds the project limit, or the selected plan has usage-based components (in which case the rule never applies).
Terminate orders auto-approve unconditionally whenever a rule is enabled — terminating a resource removes future billing, so the cost check is always satisfied. Update orders use the same recurring monthly cost check as new orders.
Once the order is created, the orders list shows an Auto-approved badge next to the approver name for any order that the rule fired on, and a filter is available to narrow the list to auto-approved orders only.
Permissions
The Order approval tab is visible to:
- Project managers and organization owners with the order-approval permission — full read/write access.
- Staff and support users — full read/write access. When a staff user without scope permission opens the edit dialog, a yellow warning banner reminds them they are configuring the rule on someone else's project.
- Project members without order-approval permission — tab is hidden, but they still see the mark-line on the cost chart and the notice on the deploy page so they know what to expect when they submit an order.
Warning
If the user who saved the rule later loses their order-approval permission on the project, the rule will stop firing automatically and a warning will be logged on the server. Re-create the rule (or re-grant the permission) to restore auto-approval.